We appreciate your interest in the online MBA Learning Center and its library of lessons.
This document will walk you through the basics of creating a course and using our content to get your class up and running. Click on a menu title on the left side of the screen to navigate through this document.
Need additional help with the MBA Learning Center?
- Click here to visit the Learning Center FAQ site
- Email your questions to: HelpMe@MBAResearch.org
Introduction to Canvas
In 2016, we transitioned the MBA Learning Center to run on Instructure's Canvas platform.
Canvas is one of the top Learning Management System (LMS) in the world today, full of features that will make your life easier and more productive.
We create Canvas sub-accounts for each school subscribed to the MBA Learning Center and make each teacher an "Account Admin" within that sub-account. This means that you are free to use virtually any Canvas feature in your classroom. As an Account Admin, you can create your own courses, customizing them so that they work to your exact needs. You are free to combine our content with yours, create new content, modify our content to suit your needs, etc. The possibilities are virtually limitless.
The content you create within the MBA Learning Center will stay there from year to year as long as you maintain your Learning Center license.
Alternatively, you can create your courses in our MBA Learning Center Canvas system and then move them to your school's LMS. You must maintain an active MBA Learning Center license to use our content outside of the Learning Center. We keep a record when you move our content to another LMS. If you do not renew your license and continue using our content, you are violating copyright.
For more information about Canvas LMS, review the official Canvas Documentation:
Canvas Video Guides for Instructors
Register Your Account
When you sign up for the MBA Learning Center, you will receive a "Welcome to the MBA Learning Center" email. Please read that email carefully as it contains important information to protect your access. Additionally, you will receive a registration email from MBA-Canvas that will take you through the process of signing up and creating a password.
If you did not receive the email from Canvas, check your spam/junk folder. If you still don't see it contact us at HelpMe@MBAResearch.org and let us know. Below is an example of the registration email.
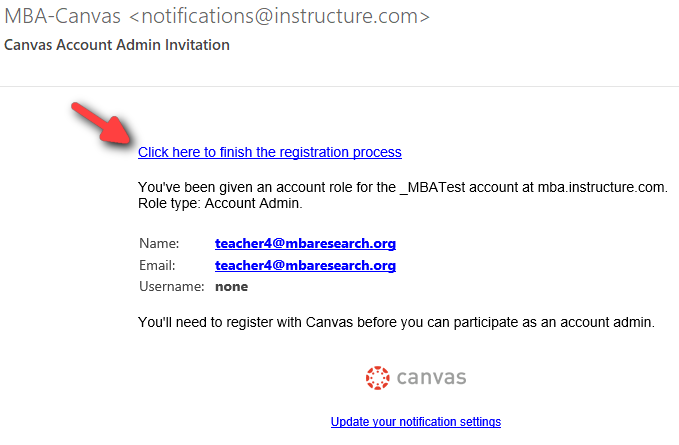
Click the link in the email from MBA-Canvas to finish the registration process.
Fill in the registration form: create a password (must be at least 8 characters), set your Time Zone, agree to the Acceptable Use Policy, and click Register.
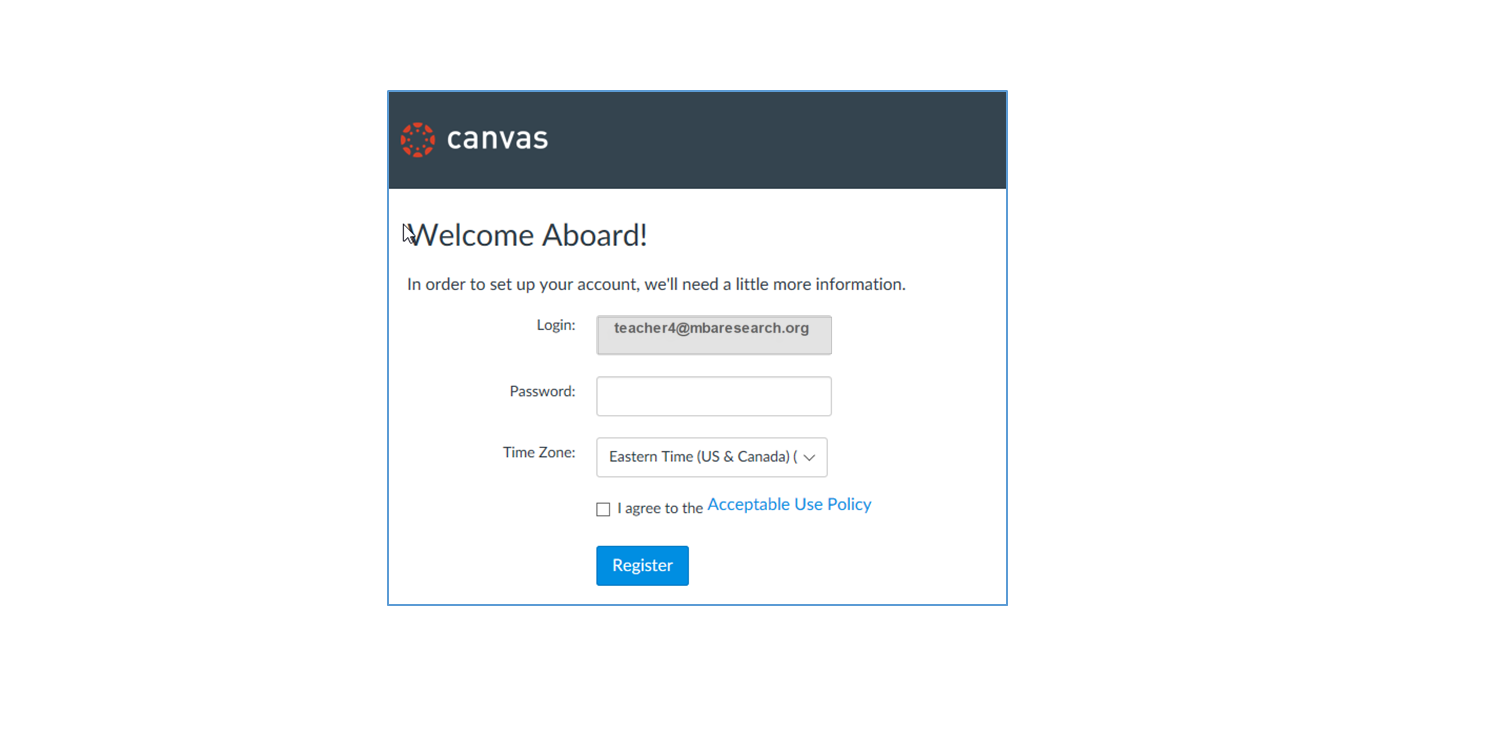
Note: Even if you already have a Canvas account from your school or another institution that uses Canvas, you must create a new account to access the MBA Learning Center (MBA-Canvas).
Logging In
After registration, you can access the MBA Learning center by going to: mba.instructure.com
The Dashboard is the first thing you will see when you log in to the MBA Learning Center (Canvas).
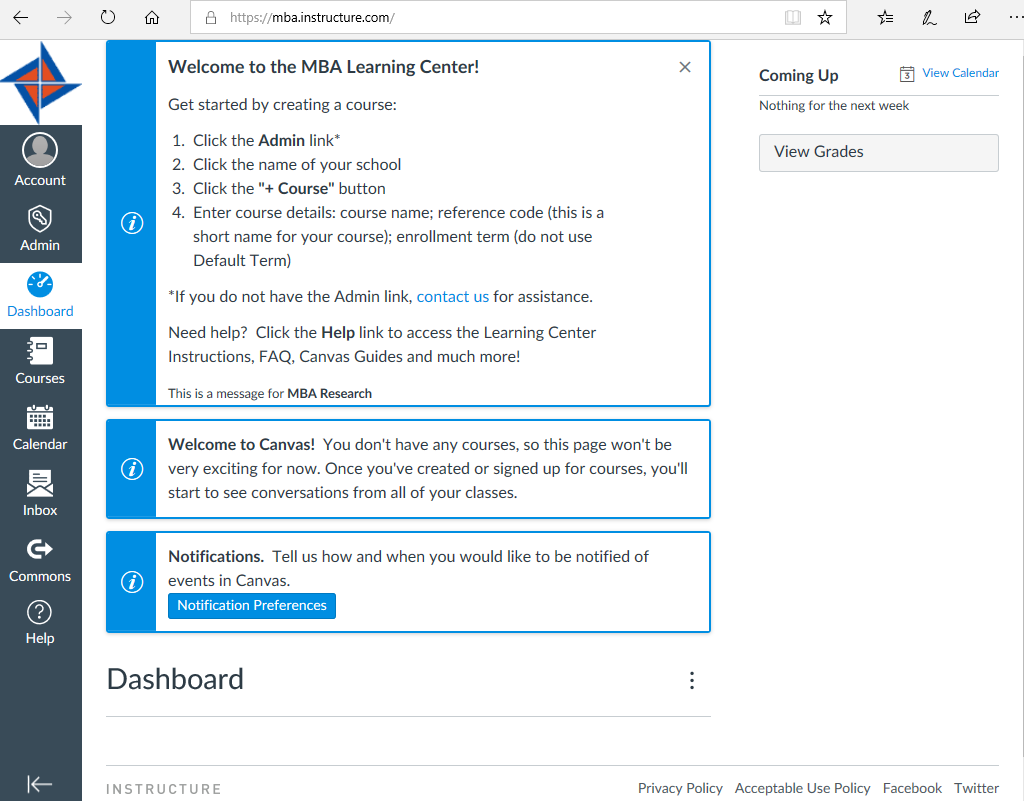
You will see a series of announcements (information boxes) on the Dashboard. Please read them carefully. You may keep these announcements on the Dashboard for reference or you may dismiss the messages by clicking the X in the upper right corner of the message box. Once you dismiss an announcement, you will not be able to view it again.
The Notifications information box allows you to set up your Canvas Notifications Preferences: how (and how often) you want Canvas to let you know what’s going on. You can set your Notification Preferences now or leave them for later. We recommend you set them later when you get a better grasp on the ins and outs of Canvas.
Click the link to learn more about Canvas Notification Preferences
Build a Course with LAPs
Don't know what a LAP is? Click HERE
You can build your own courses from the 300+ LAPs available. Still not sure about which LAPs to use? No problem! We can help you with that! We’ve designed a series of preloaded courses in entrepreneurship, finance, management and administration, ethical leadership, and marketing. They coincide with our course guides.
Learn about course guides here.
Thanks to our partnership with the Daniels Fund, all of our course guides are now free to anyone who requests them. The Daniels Fund asks only that you take a few minutes to fill out a brief survey, letting them know how you will be using the resources that they have so generously sponsored. You can find the course guides in our online store:
The MBA Shop
Teachers in our Member States can also find out more about each course by accessing free course profiles available in your State's Connection.
Before you can access and use the LAPs, you need to create a course. After creating your course, you can import the LAPs that you want to teach into that course.
Step 1 - Create an Empty Course
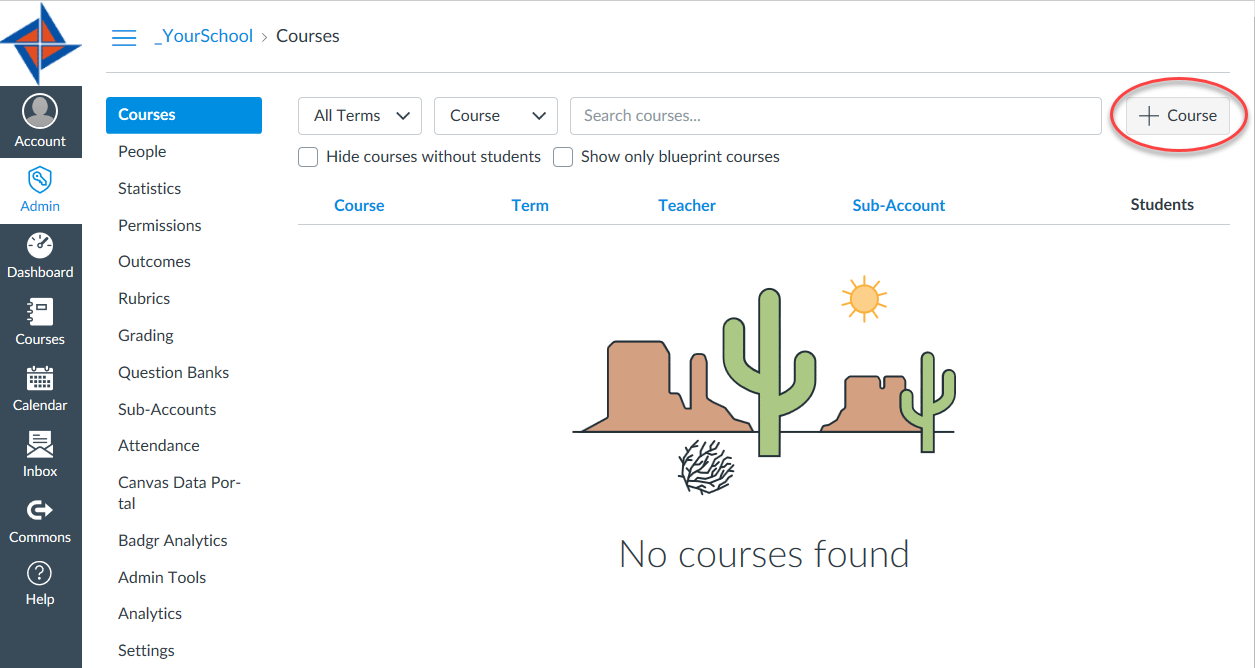
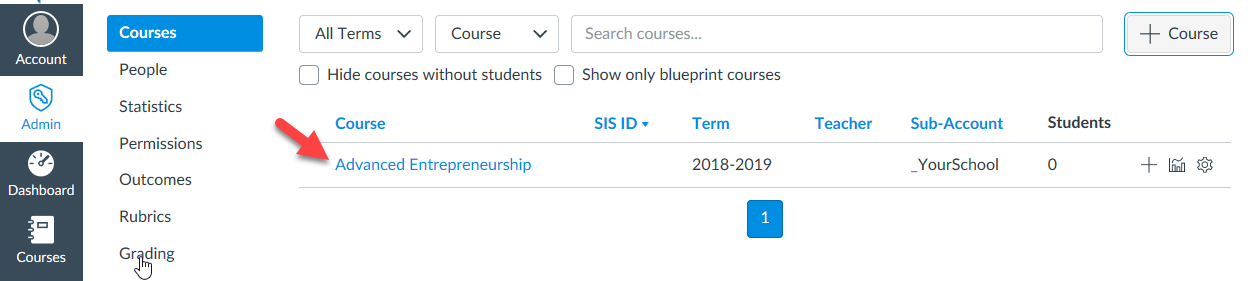
Select Admin from the Global Navigation menu on the left side of the screen, and then click on your school's account.
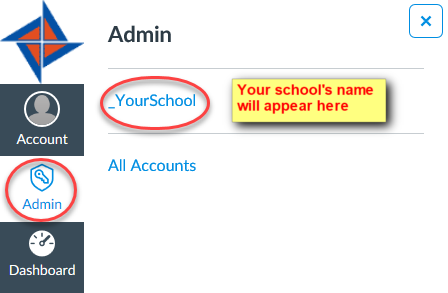
Note: If you do not have the Admin link, please contact us for assistance.
Click the Add Course button.
A Note on Screen Sizes
Canvas arranges some of the screen content based on screen width. On a wide screen the Add Course button will be on the right side of the screen. On a narrower screen (like a tablet or small laptop) the button will be moved down the page. If you don't see the Add Course button on the right side, look further down the screen for it.
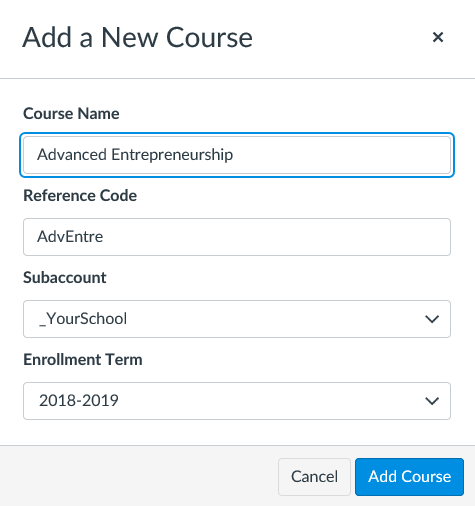
Step 2 - Name Your Course
Add Course Details:
Course Name – create a descriptive name for the course.
Reference Code – create a short name for the course (it can be whatever you want). Canvas will display the reference code at the top of the Course Navigation menu when you are inside the course.
Subaccount – click the drop-down menu to select your school’s account.
Enrollment Term – click the drop-down menu to select the school year in which you will teach this course.
- Do NOT use "Default Term" as the enrollment term for your course.
- Please use the predefined Enrollment Terms created by MBA Research, which runs July 1 through June 30 of the school year.
- After creating the course, you can change the term start and end dates, under Course Settings.
- We add new term periods towards the end of the current school year.
Click the Add Course button to create the course.
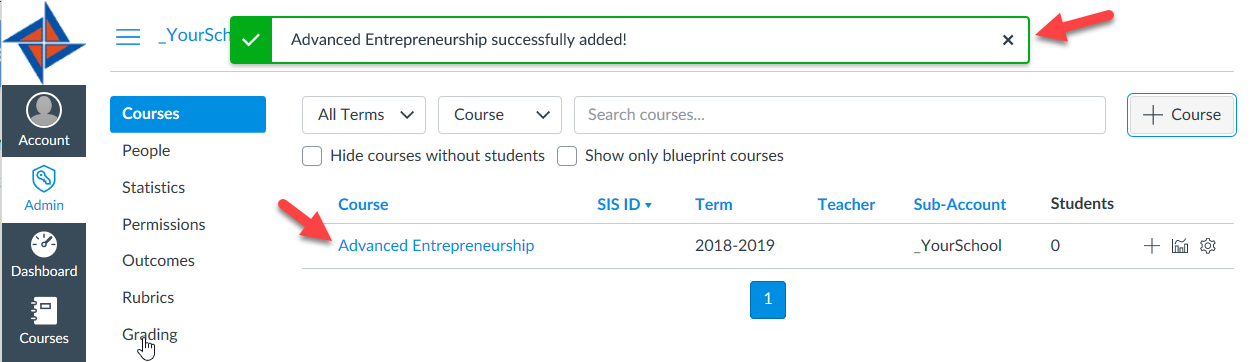
You will see a confirmation on the screen that the course was successfully added. The course will appear in the list of courses on the screen. Refresh the web page if you do not see the course.
Step 3 - Enroll Yourself
Canvas will not allow you to import content into a course until you add a teacher (you!) to the course.
Add a Teacher (You) to the Course
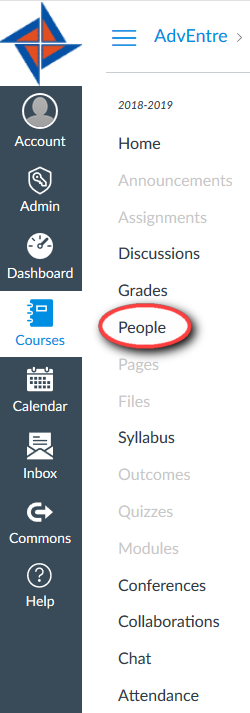
Click the blue linked course name to open the course.
In the Course Navigation menu on the left, click the People link.
Click the Add People button:
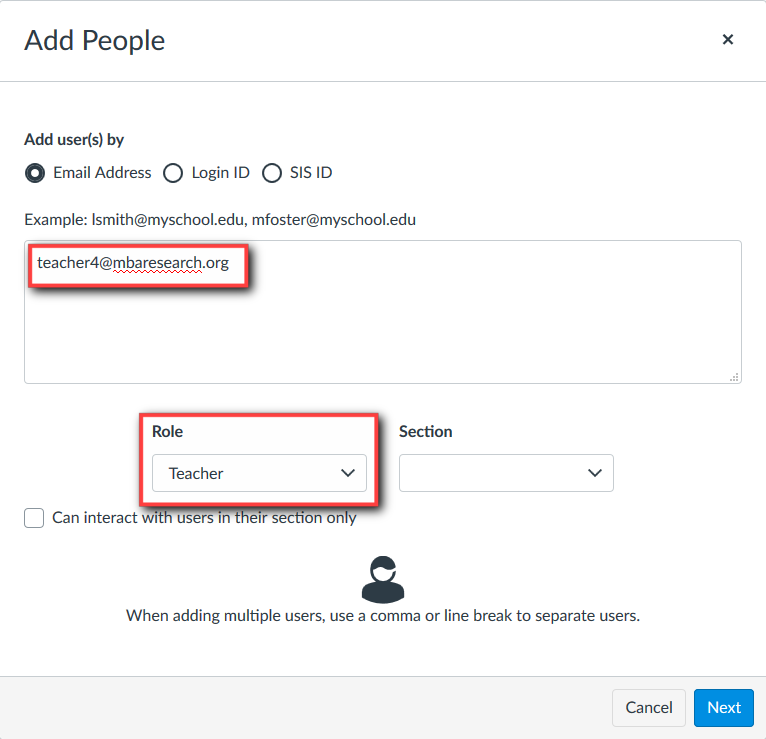
By default, the Add People window is set to add users by email address.
Enter your email address in the text box (this is the same email you used to register for MBA-Canvas). In the Role drop-down menu, select "Teacher". Click the Next button.
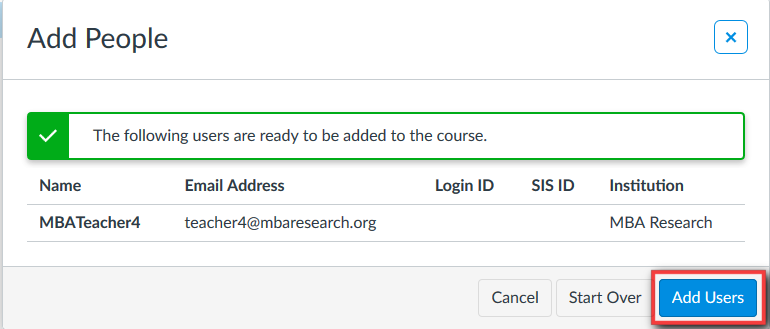
Confirm the user you are adding to the course. Click the Add Users button.
Click the link to learn more about Roles in Canvas
You will return to the People screen where you will see “pending” next to the name. This means that the course invitation needs to be accepted.
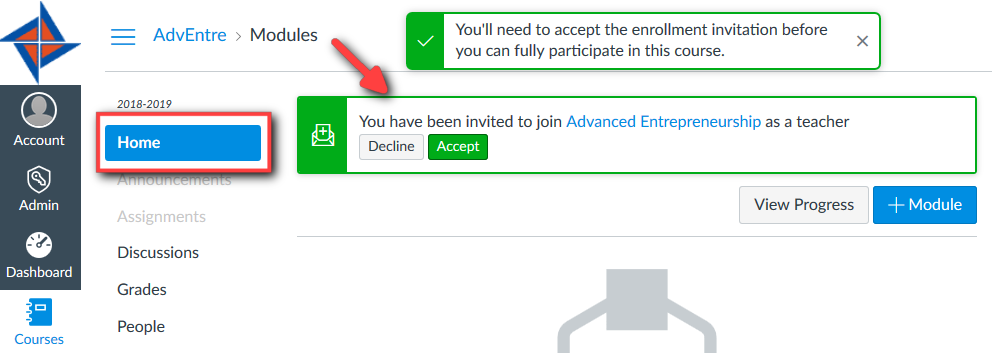
Accept the invitation to become the Teacher in one of two ways: (1) Canvas will email you, and you can accept the invitation from that email, or (2) With the course still open, click the Home link on the course navigation menu. You will see a notification message at the top of the screen inviting you to join the course. Click Accept to join the course.
Step 4 - Add LAPs To Your Course
Access Commons
Commons is the repository where all of the MBA Research LAPs are stored and where you will go to import content into your newly created course.
In Global Navigation, click the Commons link.

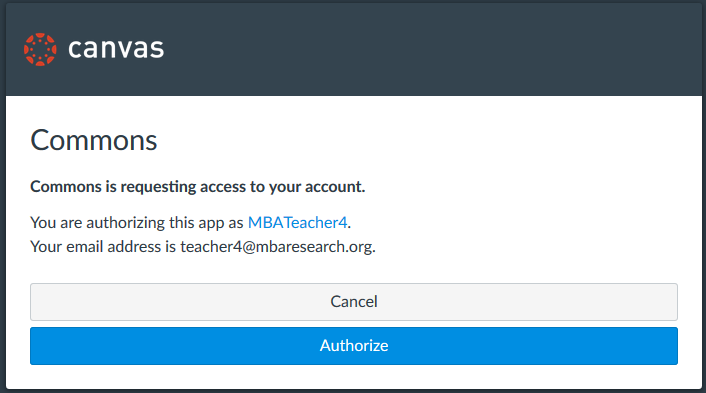
The first time you access Commons, you will need to authorize it. Click the Authorize button.
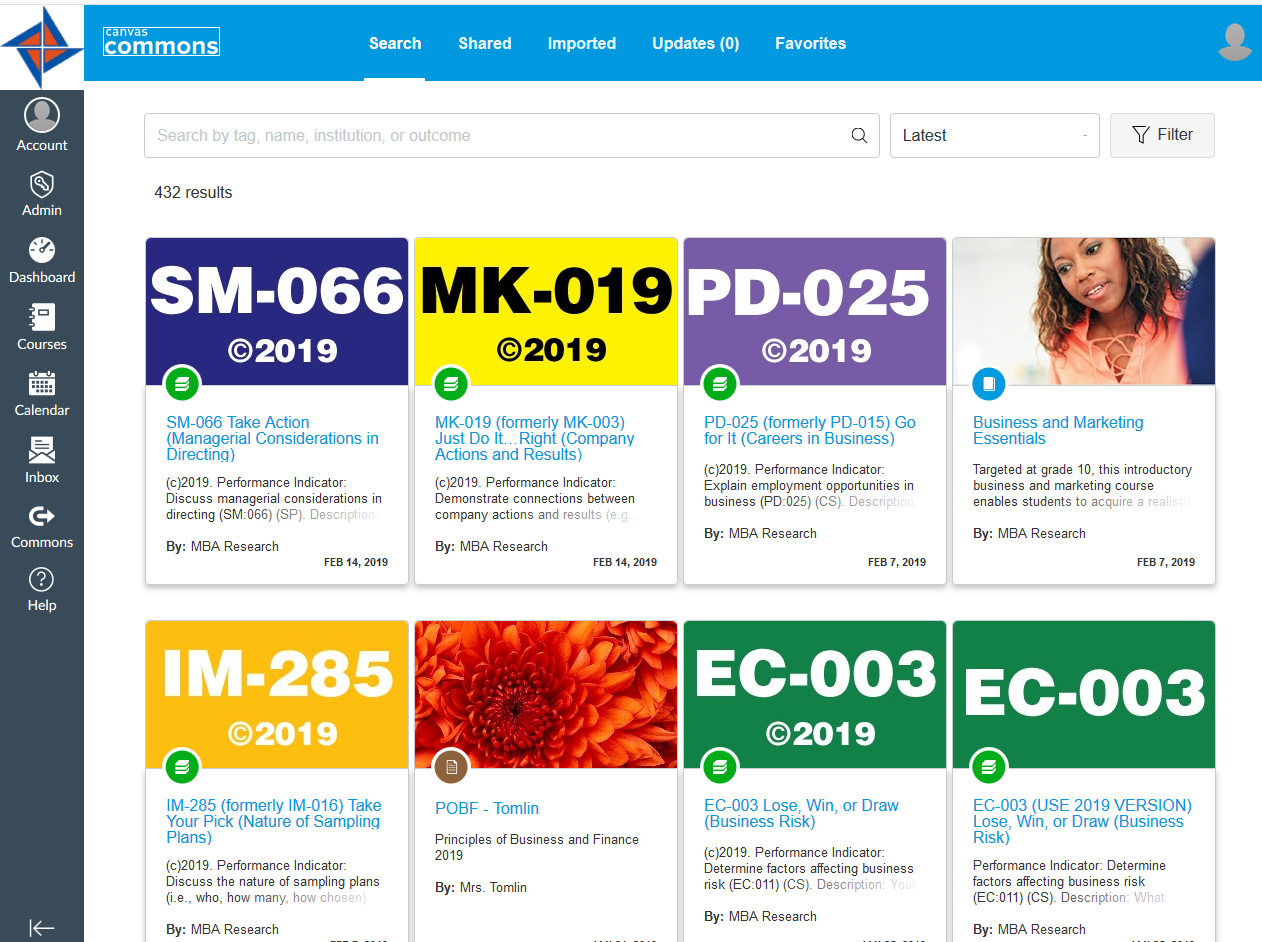
When you enter Commons, you will see a list of content cards. Each content card displays a Commons resource such as a course, module (LAP), quiz, assignment, etc. MBA Research is continually adding new content to the system so the content cards that appear on your screen may differ from the screenshot below.
Click the link to learn more about Commons
Search for LAPs in Commons
To find LAPs in Commons, type the LAP number into the search field. For additional ways to search for LAPs, read this FAQ
View a List of LAPs here
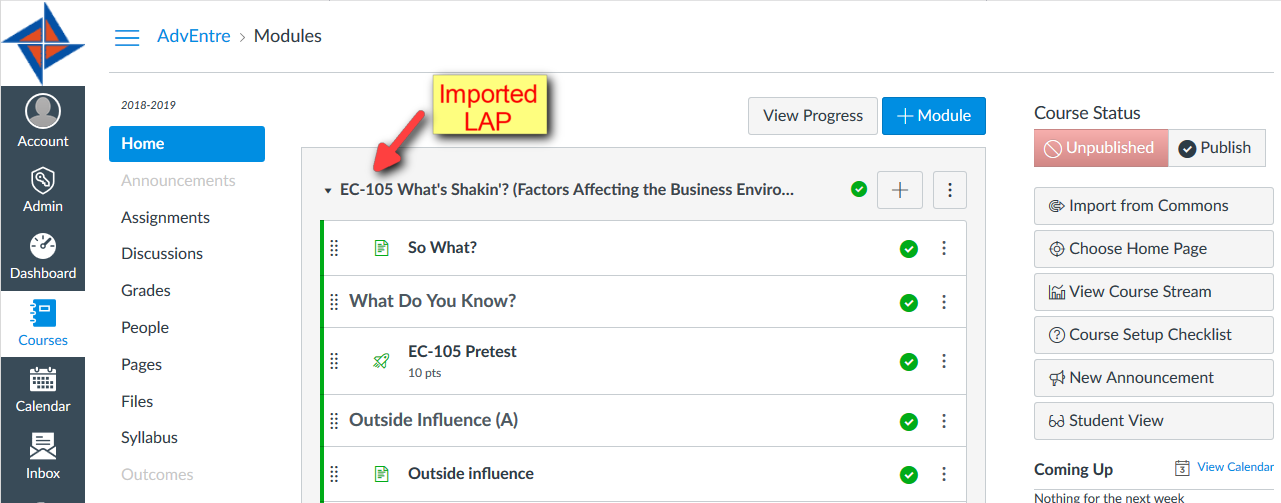
For these instructions, we will choose a LAP to put into the course: LAP-EC-105 What's Shakin'? (Factors Affecting the Business Environment). However, you can also import one of our preloaded courses into your course. Learn more about preloaded courses here.
- Type EC-105 into the search field.
Note: If more than one search result is displayed, you may need to scroll through the results to find the exact LAP you need.
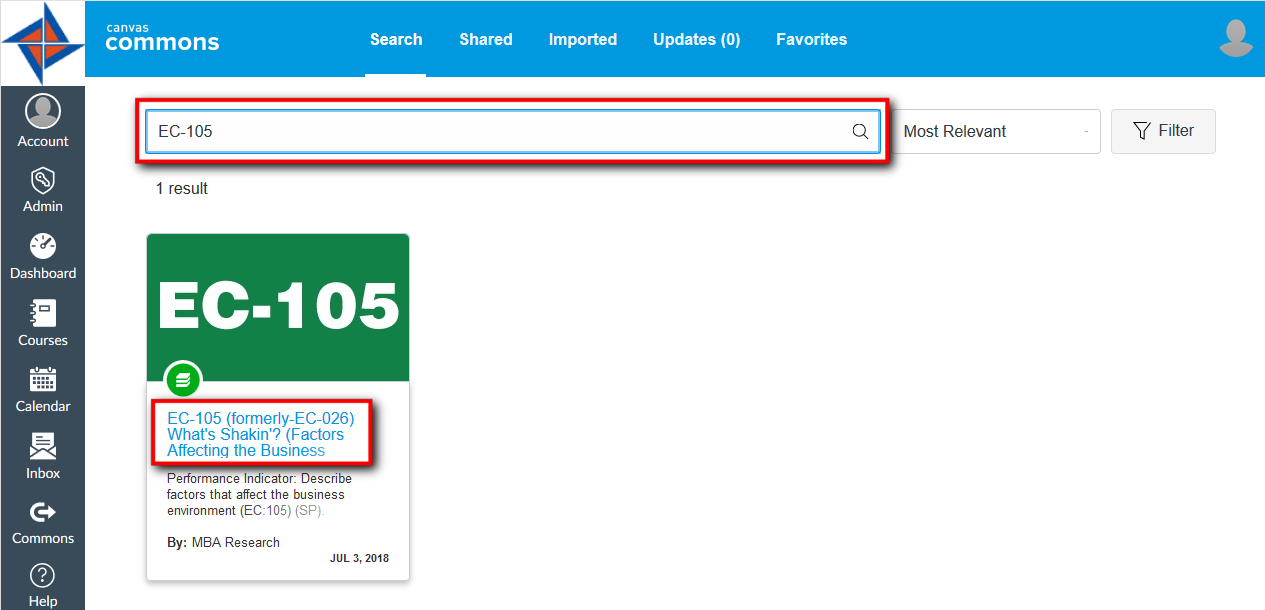
Click the resource title (blue link text) to preview and import the LAP.
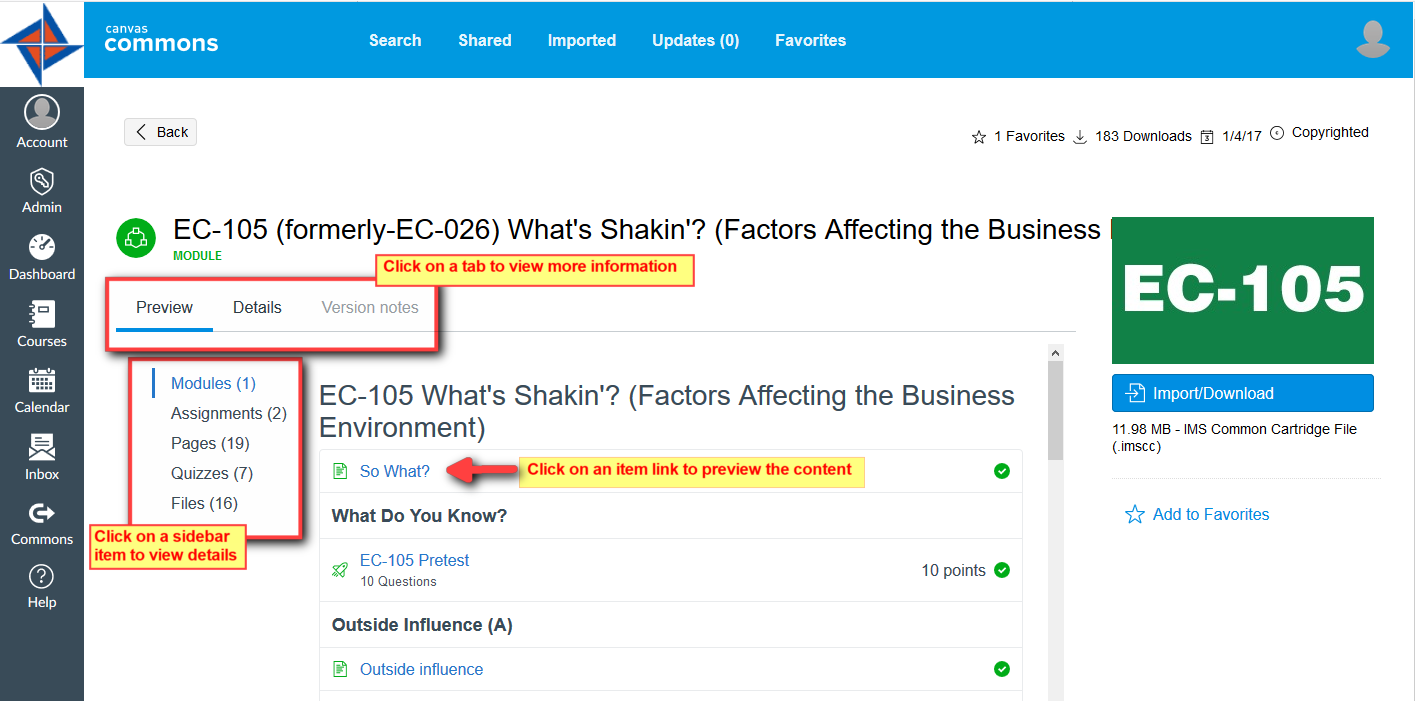
In the content overview page you can view the following information about the LAP (or resource):
The “Preview” tab is the default content view. Click a section in the left sidebar to preview the LAP content. Content is listed in the preview area of the screen. To preview a content item, click the item title.
In the “Details” tab, you can view a description of the LAP and other related information.
The “Version notes” tab gives a history of updates made to the LAP (if there are no updates, this tab is grayed out).
Click the link to learn more about Previewing Content in Commons
Import a LAP into Your Course
When you are ready to import the content, click the Import/Download button.
In the sidebar window that appears, select the course into which you would like to import the content. Then click the Import into Course button.
Notes:
The "All" box is checked when only one course is listed.
You must enroll yourself as a Teacher in the course to import LAPs into the course. If you do not see your course in the list, then go back and add yourself as a Teacher to the course (review step 3 of these instructions).
- Alternatively, you can download the content to a file on your computer. To download the file to your computer, click the Download button. Learn more about downloading LAPs here.
Click the link to learn more about Importing Content into Course
Important Note
Canvas has a bug that affects importing content into courses. If you import too many LAPs too quickly, the import feature will be stuck, keeping you from adding any more content into that course. As you import each LAP, go to the course and make sure each import is finished before starting on the next one.
To view the content in your course, click the Courses link on the left side of the screen, and then click on the course you are creating.
When you go to the course immediately after importing, there may not be any content on the page. It may take Canvas a few minutes to import the content into your course.
Refresh the web page until you see the LAP content appear.
A Note on Import Status
If the resource is still being imported, you will see a status notification when you open your course. Click the Import Status link.
You can also check the import status by going to the course Settings and then click the Import Course Content link on the right.
The Current Jobs menu displays the status of the import.
Click the link to learn more about Import Status
Import More LAPs
Click the Commons link. Search for another LAP and import it into the course.
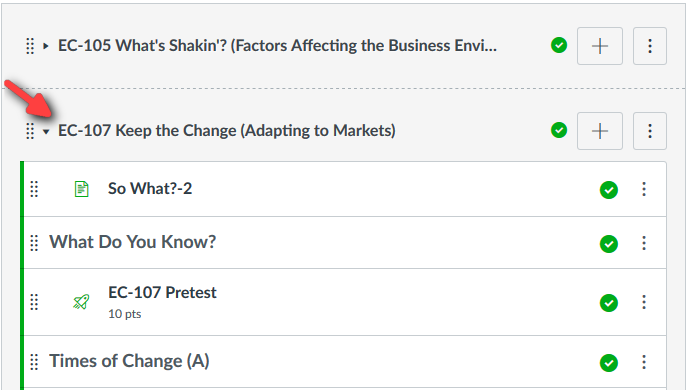
Go back to the course (click Courses link, and then select the course) and refresh the page until you see the LAP appear as a new module in the course.
Go back to Commons and keep importing LAPs until you have all that you want in your course.
Working With Modules
All LAPs are modules. Modules control the entire flow of your course and its content. As an instructor, you can add modules, add items to a module, and manage module settings. You can also reorder all modules and module items.
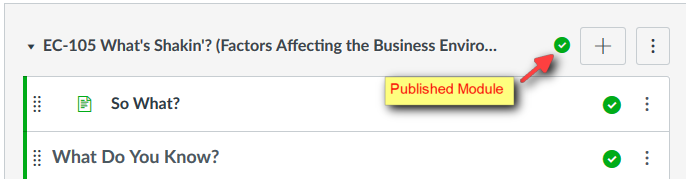
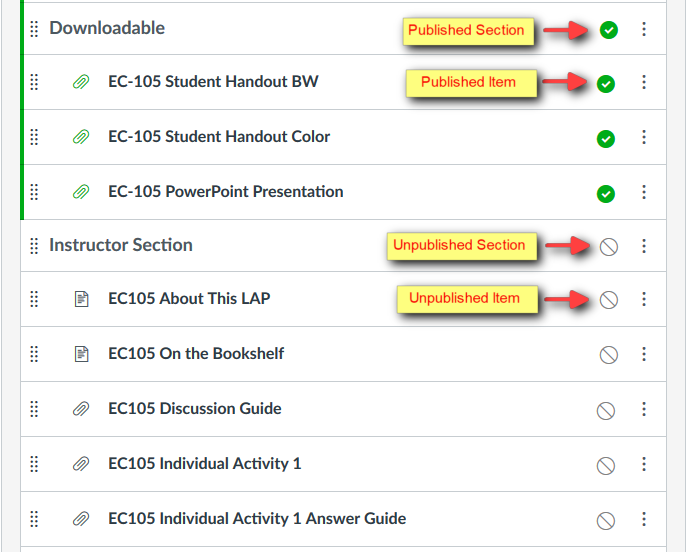
Scroll through a LAP in your course and check out the content. Sections and items in green are published, which means your students can see and access the content. Sections and items in gray are unpublished, which means the content is not visible to students.
By default, we publish the LAP and its contents. However, you will see a large section of unpublished material at the end of the LAP called the "Instructor Section". This is all of the instructor reference material, including answer keys, the discussion guide, and other content intended just for teachers.
Important Note of Caution
As an instructor, you can publish or unpublish a module in a course. Publishing a module will automatically publish any unpublished content items within the module. If you unpublish a LAP in your course and later re-publish the module, then all of the module items (even the items that were previously unpublished in the Instructor Section) now become publish and visible to students. In that case, you will need to unpublish individual module items that should be invisible to students.
Additionally, we created section titles, eg. Instructor Section, in the LAPs. Canvas handles the section titles as an item in the module, therefore changing the status of a section title does not affect the items below that section. If you want to update the status of the items in a section, you must change each item status to either publish or unpublish.
By default, modules are expanded and show all items in the module. You can collapse the module so that only the title appears. This makes it easier to navigate the course when it has multiple modules.
Click the arrow next to the module title to collapse the module.
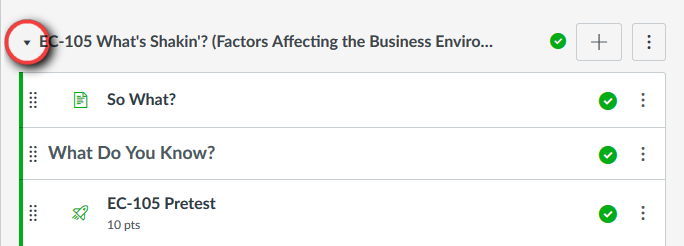
The collapsed module looks like this.

For more information about Modules, you can check out the Canvas Documentation:
Organize Your Modules
By default, LAPs appear in the order in which you import them into the course. After you have imported all of the LAPs you need for this course, you can organize them in the order in which you want to teach them; or sequence them to align with the course guide.
You can move or reorder modules in a couple ways: (1) manually drag and drop the module. Click the drag handle next to the module name, and drop the module in the desired location by releasing the mouse. (2) Use the Move Module link: click here for instructions.
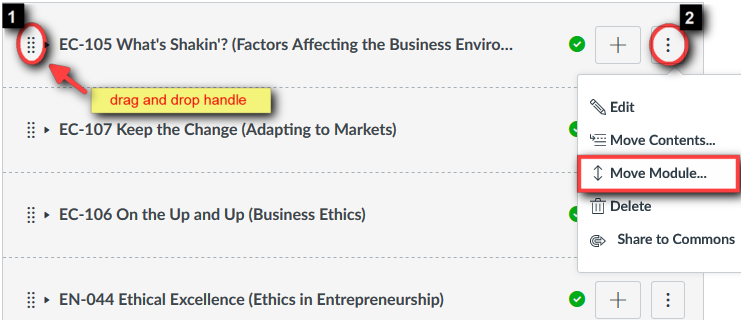
The animated image below shows how to use the drag and drop handle.
Step 5 - View Course Settings
The Settings navigation link is where you can easily customize your course, see the different users and sections, and modify the navigation of your course.
With your course still open, click the Settings link in the Course Navigation menu.
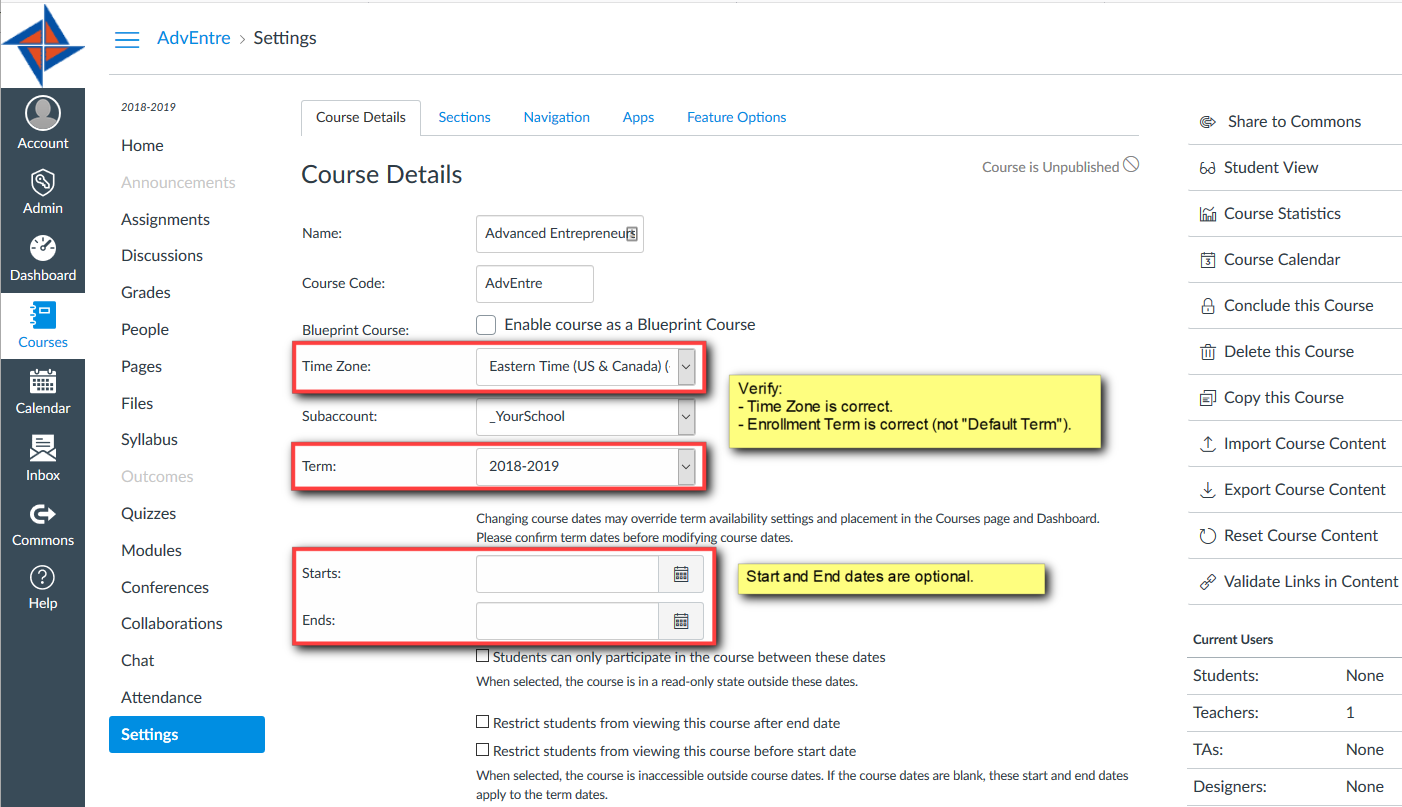
View Course Details
In the Course Details tab, you can view and change the details of your course, including the name, course code (reference code), term, start and end dates. You can also view the course status (more about course status in step 7 ).
Verify that the Time Zone and Term are set properly for your course. Do NOT use “Default Term” in the Term field.
By default, courses inherit term dates set by MBA Research, which runs July 1 through June 30 of the school year. However, as an instructor, you may need to change the start and end dates for your course. Dates can be shorter than or overlap the default term dates.
Tip: Under the end date field, you can restrict your students from being able to access the course outside of the start and end dates.
Note: To save changes made to the Course Details page, scroll to the bottom of the page and click the "Update Course Details" button..
A Note On Language
Setting the Language in Course Settings or Account Settings does not change the language of the course. It sets the language of the Canvas menus and options for that course. The LAP contents are, and will remain, in English regardless of the Language setting.
FAQ:
How do I change the language preference in my Learning Center account?
How do I translate the Learning Center content into another language?
View Navigation
This step is optional, but it will make navigating your course easier for students.
The Course Navigation menu is a series of links on the left side of your course that help you and your students access different course areas.
In the Navigation tab, you can control which links appear in the Course Navigation menu. You can drag and drop to reorder and hide course navigation links. Hidden navigation links will not be visible to students.
For example, some sections of the LAPs are stored as Canvas Pages. When you click on the Pages link on the Course Navigation menu, all of the Pages are listed alphabetically rather than organized by module, which might be confusing for your students. You can hide the Pages link so that students do not see it.
To reorder or hide navigation links click the navigation link you would like to move. Drop the navigation link in the desired location by releasing the mouse. Then click the Save button.
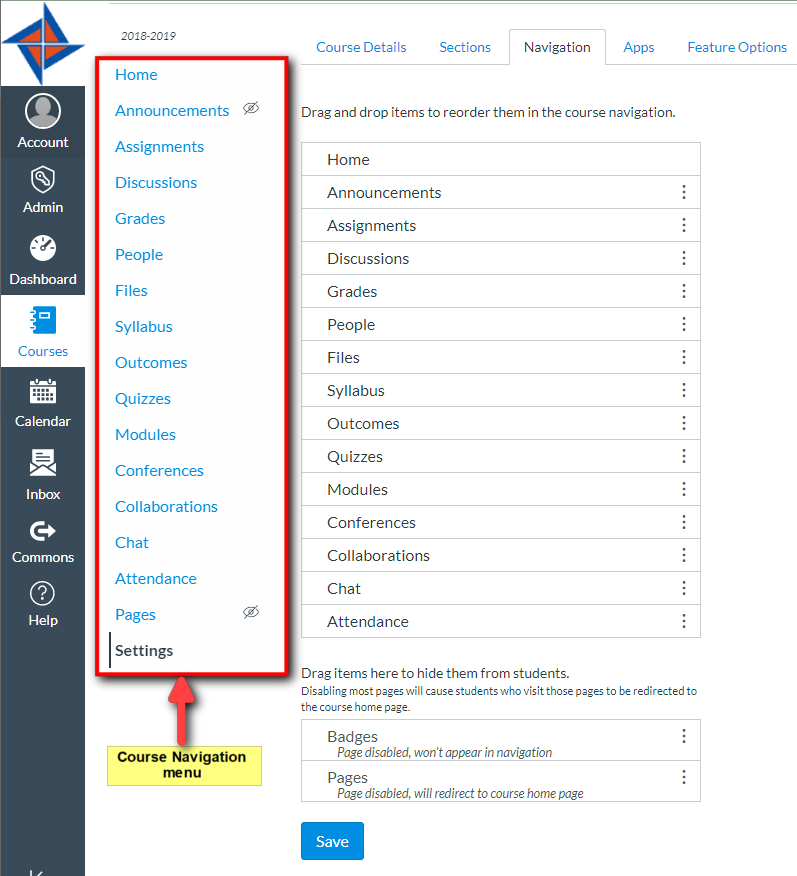
Note: Links that are hidden to students are indicated by a visibility icon on the Course Navigation menu. Links with no content are automatically invisible to students.
For more information about Course Settings, you can check out the Canvas Documentation:
Change Course Start and End Dates
Manage Course Navigation Links
Step 6 - Set Course Home Page
The Course Home Page defaults to the Modules layout. You can change the Home Page to reflect one of five layout options: the Recent Activity Dashboard, Pages Front Page, the Course Modules, the Assignment List, or the Syllabus.
Tip: MBA Research LAPs are created as Modules so it may be easier to leave "Course Modules" as your Home Page.
For more information about Course Home Page, you can check out the Canvas Documentation:
Step 7 - Publish Your Course
You can publish your course in the Course Home Page sidebar that appears on the right. In the sidebar, click the Publish button. The course is published when the Published button is green.
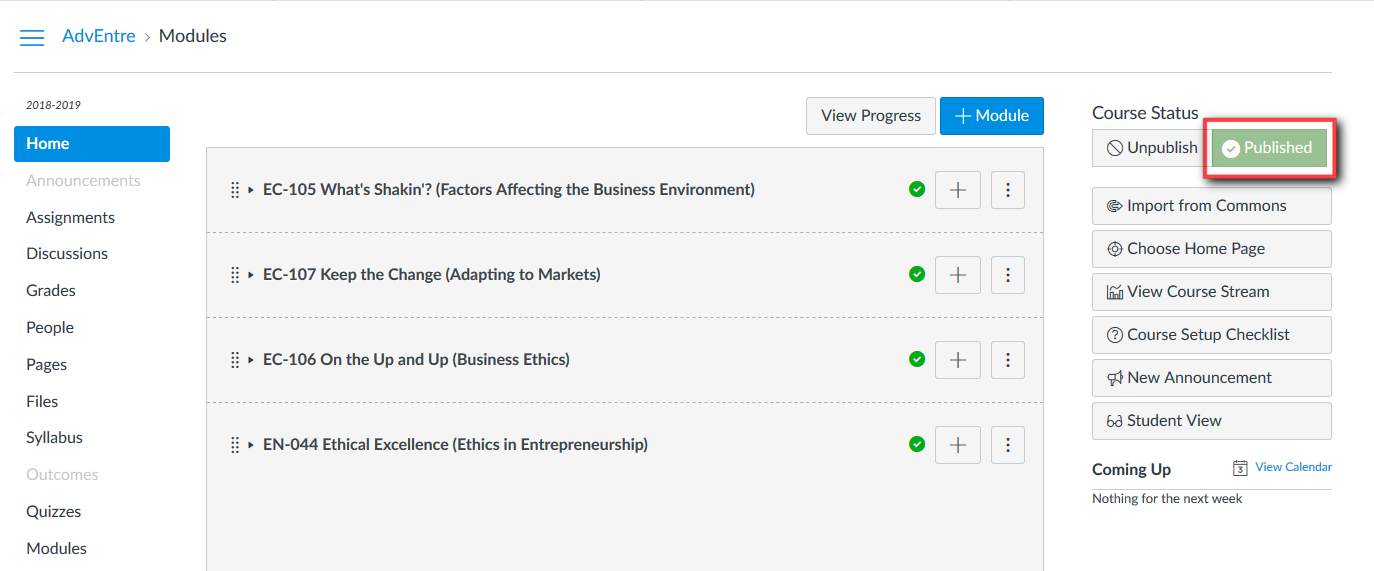
Tip: If you need to unpublish your course, click the Unpublish button in the sidebar. The course is unpublished when the Unpublished button is red.
Notes:
On smaller screens, the sidebar displays beneath the Course Home Page content.
You must publish a course before students can access it and its contents. If the course is unpublished, Canvas cannot send out course invitations to students. In addition, students who already received course invitations will not be able to access your course.
Your course is now ready to go; you just need to add students.
Step 8 - Add Your Students
You must purchase student licenses before adding your students to the MBA Learning Center. If you add students without first purchasing student licenses, you will be billed for these student accounts at the current rate. Please help us control costs and pricing: use only what you’ve licensed.
Student licenses can be purchased in our online store using a credit card or purchase order number:
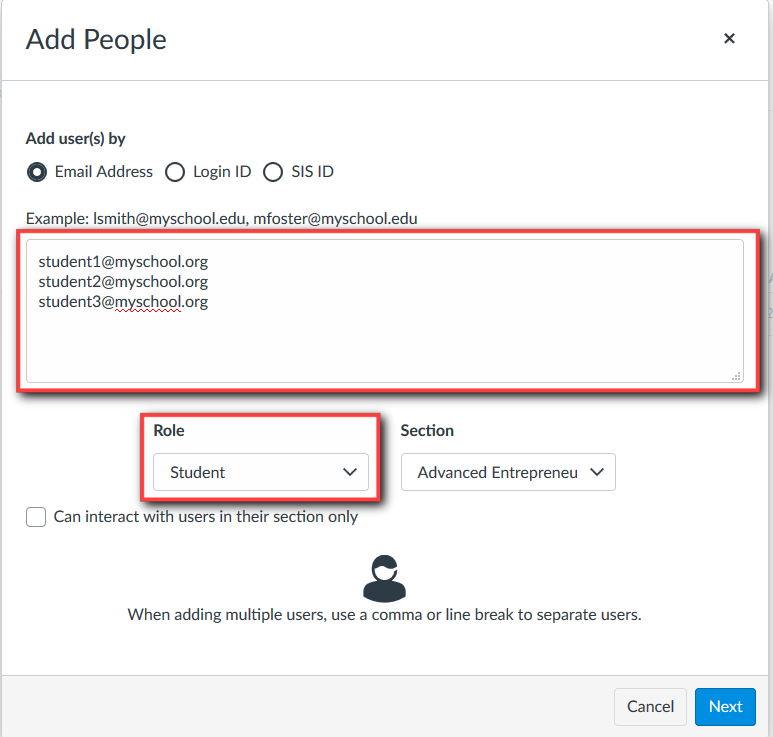
In the Course Navigation menu, click the People link. Click the Add People button.
Add your students by email address. In the Role drop-down menu, select the role of "Student”. Click the Next button.
Note: You can add multiple users at one time by placing a comma or line break between user emails. If you are adding multiple users at the same time, all users inherit the same role and section. Check the spelling of email addresses before proceeding, if the email address is misspelled, the student will not receive the course invitation.
Next, follow the instructions on the pop-up screen to confirm the students before adding them to the course.
- Add New Users: If Canvas does not find a user match (i.e. the student is not already in the system), Canvas will ask you to create a new user account. Click the Select All checkbox to add all users in the search results. You can choose to add student’s name; otherwise, Canvas will use the email address as the student's name. When you are ready, click the Next button.
- Add Existing Users: If Canvas finds existing user(s), the user's information displays in the page.
Finally, click the Add Users button to add the students to the course.
You will see “pending” next to the name on the People page. This means the student has not accepted the course invitation. Students will get an email invitation from MBA-Canvas with a link for them to register for Canvas (if they do not already have an account) and join the course. The user must accept the course invitation to participate in the course. Until the user accepts the course invitation, the user's status will display as pending.

Additional Notes:
Users are not sent a course invitation until the course start date. The start date is commonly the term date, unless the term is being overridden by a specific course or section date in Course Settings. Additionally, courses must be published for students to receive course invitations.
Once you add a student to the course, you (the instructor) cannot edit the student’s name. However, the student may edit the name after joining the course. Click here for instructions.
For more information about adding users to your course, you can check out the Canvas Documentation:
Reference
What is a LAP?
A Learning Activity Package (LAP) is a comprehensive instructional module designed to teach a specific topic. Based on a single performance indicator from the National Standards for Business Administration, each LAP contains all elements of a performance-oriented lesson plan, including an in-depth student narrative, handouts, activities, assessments, discussion guide, glossary, PowerPoint presentation, links, and much more.
Each LAP provides in-depth learning, with a focus on real-life application in the business community. LAPs are designed to help students move beyond learning "about" business to learning to "do" business in the real world. LAPs provide more depth and a greater emphasis on application than typical textbooks or other educational resources.
Quick Study Modules (also referred to as Quick Study LAPs) are abbreviated lesson modules; they do not contain as much content as a full LAP. Also based on one specific performance indicator, each of these abridged instructional modules contains a student narrative, quick case study, discussion guide, glossary, and short assessments. Available exclusively through the MBA Learning Center.
Just For You! Modules are “mini” instructional modules; content varies. Each Just for You! module typically contains one of the following instructional tools: a rubric, briefing, performance checklist, or student activity and handout designed to teach and/or assess an individual performance indicator. Just for You! modules are not as comprehensive as LAPs or Quick Study Modules. Available exclusively through the MBA Learning Center.
Click the link for a List of LAPs
Visit our website to learn more about LAPs.
How Are LAPs Organized?
LAPs are broadly organized by Instructional Area.
The MBA Research Instructional Areas are:
- (BL) Business Law
Understands business's responsibility to know, abide by, and enforce laws and regulations that affect business operations and transactions - (CC) Compliance
Understands business's responsibility to know, comply with, and enforce laws and regulations that affect financial business operations and transactions - (CM) Channel Management
Understands the concepts and processes needed to identify, select, monitor, and evaluate sales channels - (CO) Communication Skills
Understands the concepts, strategies, and systems used to obtain and convey ideas and information - (CR) Customer Relations
Understands the techniques and strategies used to foster positive, ongoing relationships with customers - (DS) Distribution
Understands the concepts and processes needed to move, store, locate, and/or transfer ownership of goods and services - (EC) Economics
Understands the economic principles and concepts fundamental to business operations - (EI) Emotional Intelligence
Understands techniques, strategies, and systems used to foster self-understanding and enhance relationships with others - (EN) Entrepreneurship
Understands the concepts, processes, and skills associated with identifying new ideas, opportunities, and methods and with creating or starting a new project or venture - (FI) Financial Analysis
Understands tools, strategies, and systems used to maintain, monitor, control, and plan the use of financial resources - (FM) Financial-Information Management
Understands tools, strategies, and systems needed to access, process, maintain, evaluate, and disseminate financial information to assist business decision-making - (HR) Human Resources Management
Understands the tools, techniques, and systems that businesses use to plan, staff, lead, and organize its human resources - (IM) Marketing-Information Management
Understands the concepts, systems, and tools needed to gather, access, synthesize, evaluate, and disseminate information for use in making business decisions - (KM) Knowledge Management
Understands the systems, strategies, and techniques used to collect, organize, analyze, and share information known in an organization. - (MK) Marketing
Understands the tools, techniques, and systems that businesses use to create exchanges and satisfy organizational objectives - (MP) Market Planning
Understands the concepts and strategies utilized to determine and target marketing strategies to a select audience - (NF) Information Management
Understands tools, strategies, and systems needed to access, process, maintain, evaluate, and disseminate information to assist business decision-making - (OP) Operations
Understands the processes and systems implemented to monitor, plan, and control the day-to-day activities required for continued business functioning - (PD) Professional Development
Understands concepts, tools, and strategies used to explore, obtain, and develop in a business career - (PI) Pricing
Understands concepts and strategies utilized in determining and adjusting prices to maximize return and meet customers' perceptions of value - (PJ) Project Management
Understands tools, techniques, and systems that are used to plan, implement, monitor, and evaluate business projects - (PM) Product/Service Management
Understands the concepts and processes needed to obtain, develop, maintain, and improve a product or service mix in response to market opportunities - (PR) Promotion
Understands the concepts and strategies needed to communicate information about products, services, images, and/or ideas to achieve a desired outcome - (QM) Quality Management
Understands the need for standards and the strategies and techniques used to implement, monitor, and evaluate them - (RA) Risk Analysis
Understands techniques and strategies used to gather, access, and evaluate the risk posed by potential insurance clients - (RM) Risk Management
Understands risk-management strategies and techniques used to minimize business loss - (SE) Selling
Understands the concepts and actions needed to determine client needs and wants and respond through planned, personalized communication that influences purchase decisions and enhances future business opportunities - (SM) Strategic Management
Understands tools, techniques, and systems that affect a business's ability to plan, control, and organize an organization/department - (VM) Innovation Management
Understand the strategies and techniques used in marketplace innovation
How Are LAPs Labeled?
LAPs are labeled first by the abbreviation for the Instructional Area (IA) that they belong to (from the above list), a dash or a colon, and then a number.
Example: LAP BL-006 is a LAP from the (BL) Business Law Instructional Area. The Performance Indicator for LAP BL-006 is BL:006. Performance Indicators are always made up of the abbreviated Instructional Area(IA), a colon, and a number.
LAP labels do not always match their Performance Indicators. LAP BL-001, for example, covers the Performance Indicator BL:003. When we first started creating LAPs, we numbered them sequentially within Instructional Areas. We are now in the process of switching the LAP labels so they match up with the Performance Indicators.
If you look in the Canvas Commons, you will see that some LAPs are labeled "IA - number" (with dashes), and some are labeled "IA : number" (with colons).
All the Full LAPs are labeled with dashes (eg. BL-001, BL-006).
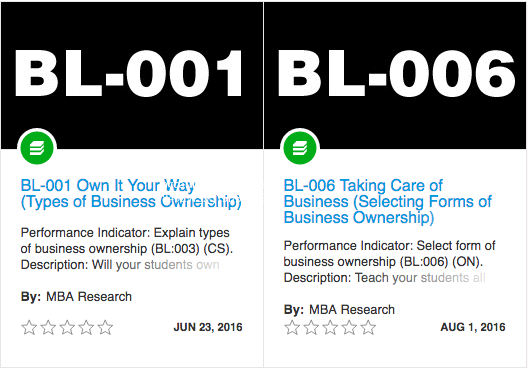
The Quick Study LAPs and the Just For You! Modules are labeled with colons. The LAP number and the Performance Indicator for these LAPs/modules are the same.
Many of the Quick Study LAPs are being adapted to full LAPs. For example, "LAP-QS-009" became "LAP-CO-025."
To help you identify the Quick Study LAPs, the “QS” LAP number has been added to each LAP label. For example, FI:270 (QS-030) and CO:119 (QS-024).
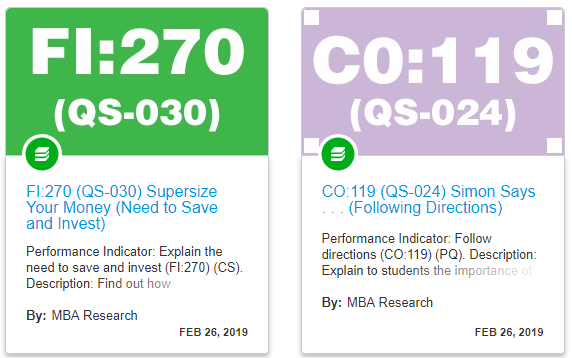
Tip: Type “Quick Study” in the Commons search bar to find the Quick Study LAPs.
To help you identify the Just for You! Modules, the phrase “Just for You” has been added to each module label. For example, OP:233 (Just for You) and NF:138 (Just for You).
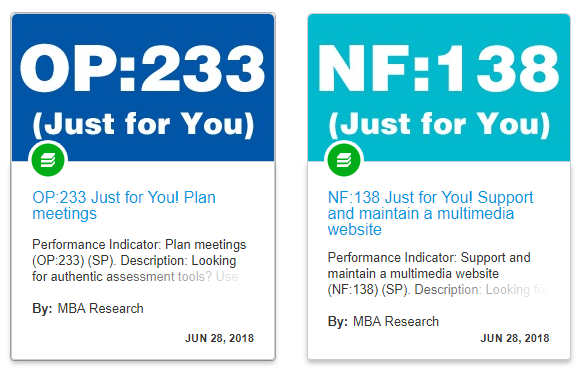
Tip: Type “Just for You” in the Commons search bar to find the Just For You! Modules.
The Dashboard and Course List
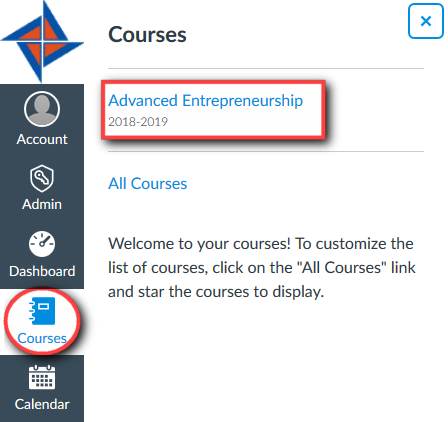
The Dashboard helps you see what is happening in all your current courses. The Dashboard will default to Card View, which displays course cards for quick access to all the courses you have created (the same courses display under the Courses link).
You can customize the active courses you want to show on your Dashboard and in your Course List. Courses you want to show are called favorite courses.
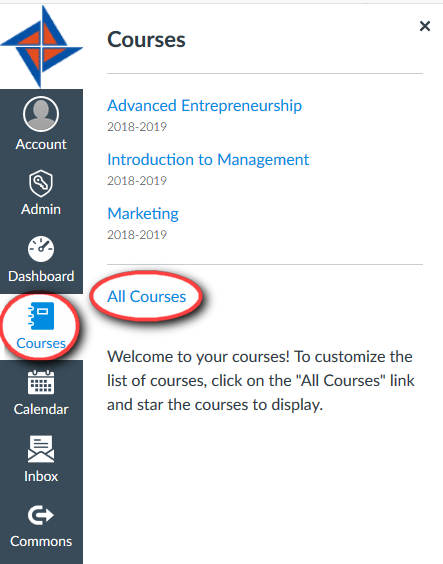
If you have created courses that you are not currently using, you can remove them from your Dashboard and the Course List by marking favorite courses. To mark favorite courses on the Dashboard and the Course List: from the Global Navigation menu, click on the "Courses" link, then click on the "All Courses" link.
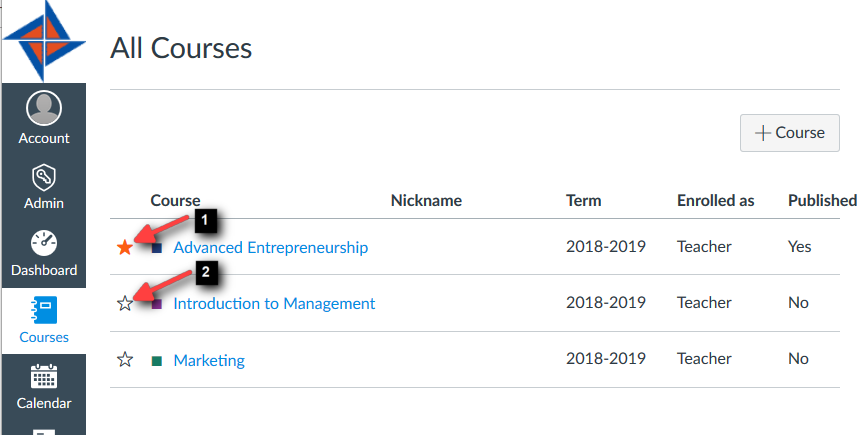
You will see a list of all your courses. Next to each course is a star icon.
Courses with filled stars show the course is a favorite [1]. To favorite a course, click the star next to a course [2].
Removing the course from your Dashboard and the Course List will NOT delete the course. You can always access it from the "Admin" link and from the "All Courses" link.
Important Note
When no courses are favorited, all active courses will automatically show on the Dashboard and the Course List will automatically displays up to 20 courses alphabetically in the Course list. Once you have selected at least one course as a favorite, only your favorite courses will appear on the Dashboard and in the Courses list.
More information about the Dashboard and Courses link: